Quick Takeaways:
- Plan for your home’s future now. Blocking, rough-ins, and structural support cost very little while you build. Add them later, and you’ll pay several times more.
- Specify 36-inch doors for a 32-inch clear opening, 42-inch halls, a 60-inch turning circle, and a 1:12 maximum ramp slope.
- Two bathroom choices give you the most for your money: a curbless shower and full-wall blocking. Step in with ease. Grab a bar anywhere you need one.
- Stack two closets vertically to create an elevator rough-in, or confirm the stair geometry will accept a rail later.
- Bring an accessibility assessment in at schematic design, not after framing closes.
A universally designed home works for you, whatever your body or ability. When done well, it simply looks like a good design: wider halls, better light, sturdier hardware, a shower you can walk straight into. Done as a retrofit, it looks like equipment added to a house that never planned for it.
The difference between those two outcomes is almost entirely about timing. This guide covers what belongs in the drawing set, with the dimensions and provisions specific enough to hand to an architect or a general contractor.
The Provisions That Only Make Sense During Construction
Start with the asymmetric decisions. These are items that cost very little while framing is exposed and become real projects afterwards.
- Blocking in bathroom walls. Continuous plywood backing behind the finished surface across every wet wall and beside the toilet. The material cost is negligible. Adding it later means opening the tile.
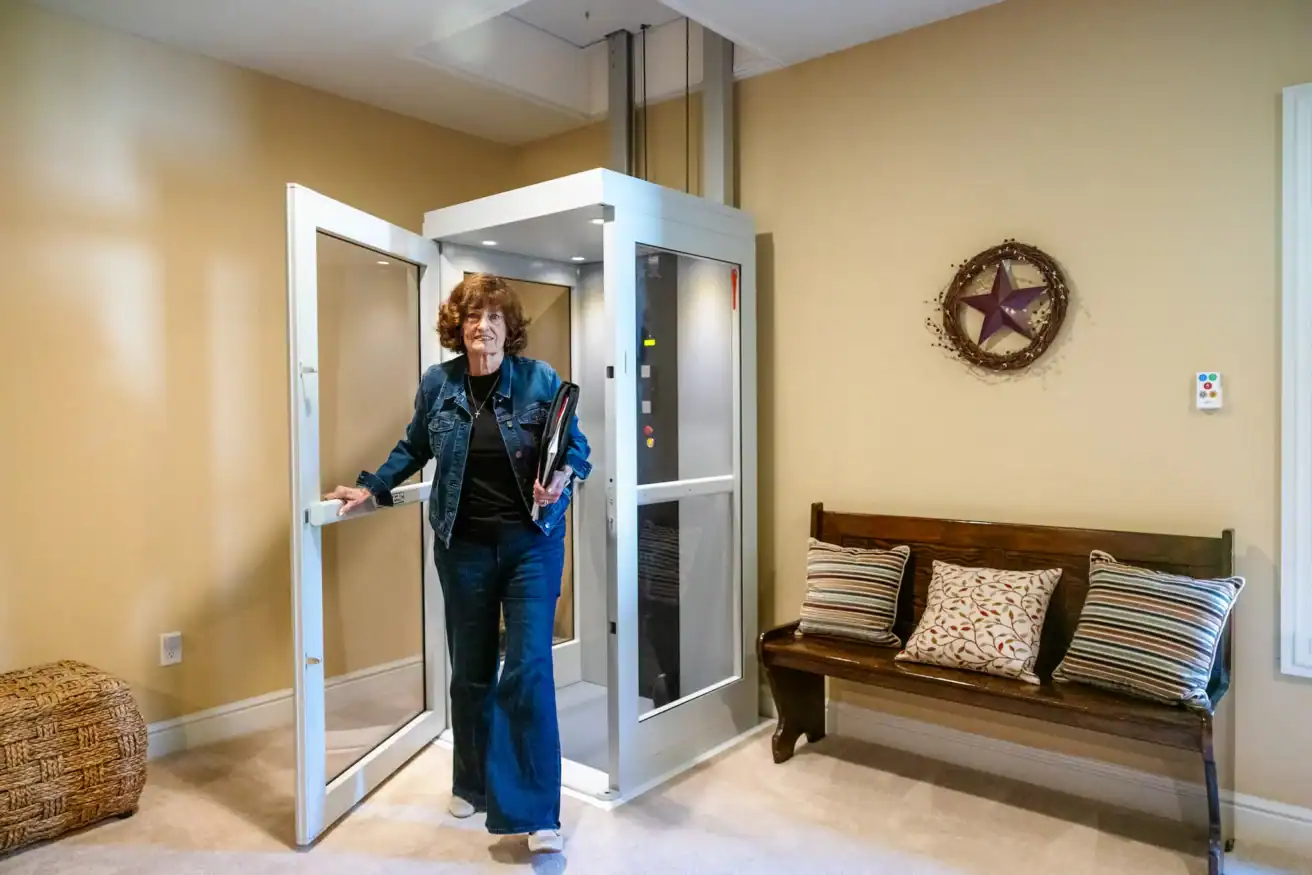
- A stacked closet rough-in. Two closets of the same footprint, one directly above the other, with no ductwork, plumbing, or beams in the cavity between them. That volume becomes an elevator shaft whenever you want it, and a closet until then.
- Structural and electrical provision at a lift location. A reinforced landing and a dedicated circuit stubbed to the right wall. Pulling a new high-amperage run through finished walls later is the expensive part of most lift installations.
- Conduit between floors. An empty run from the basement or mechanical space to the upper level gives every future system a path.
- Door and hallway framing. Framing one size wider costs almost nothing in rough carpentry and cannot be changed later without touching structure, trim, and finishes.
None of these require you to decide today whether you will ever install a lift or a grab bar. They preserve the option cheaply, which is the whole point. A homeowner who skips the blocking and later wants a grab bar is looking at a tile repair. A homeowner who included it is looking at a thirty-minute installation.
Dimensions to Specify
| Element | Specification | Why it matters |
|---|---|---|
| Door clear opening | 32 in minimum, from a 36 in door | The slab size is not the clear width. Hinges and stops take 1.5 to 2 in |
| Hallway width | 42 in, 48 in preferred | 36 in is code minimum and too tight for a turn into a doorway |
| Turning circle | 60 in diameter | The clear floor space a wheelchair needs to reverse direction |
| Threshold height | 0.5 in maximum, beveled | The most common trip point and the easiest to design out |
| Ramp slope | 1:12 maximum, 1:16 preferred | 1 in of rise per 12 in of run. Gentler is easier to use and looks better |
| Counter heights | Vary: 30 in, 34 in, 36 in zones | One lower work zone with knee clearance serves seated and standing use |
| Switch height | 42 to 48 in to center | Reachable seated or standing, and it reads as deliberate |
| Outlet height | 18 in to center | Higher than standard, easier for everyone, no visual cost |
Hold the clear opening, threshold, and blocking numbers without negotiation. They are inexpensive and irreversible. The counter and switch heights can flex to suit the design. If a contractor pushes back on hallway width because of square footage, the trade worth making is usually narrowing a secondary bedroom rather than the circulation path.
Room by Room
Entry and Circulation
Design at least one zero-step entry. In most cases the better solution is not a ramp but a regraded approach, where the walkway rises gradually over a longer run and arrives level with the threshold. It costs more in landscaping and less in built structure, and it does not read as equipment.
Where a ramp is the only option, hold 1:16 if the run allows it. Specify lever handles throughout, since they work with a full hand, an elbow, or an armful of groceries. Automatic door openers at the main entry are worth pricing now: the wiring is trivial during construction and the convenience is immediate rather than hypothetical.
The Bathroom
A curbless shower is the highest-value single decision in the room. It requires the floor framing to be dropped or the drain line reconfigured, which is a framing-stage conversation and not a finishing-stage one. Use a linear drain at the far wall with a consistent slope across the pan. Built properly, a curbless shower with a frameless glass panel is a feature you would specify in any high-end bathroom regardless of accessibility.
Run blocking the full length of every wet wall at 32 to 36 inches to center, and behind the toilet wall as well. This is the single cheapest insurance policy in the project. Do not attempt to predict where a bar will go. Block the whole wall and keep every option.
Comfort-height toilets, a wall-hung vanity with knee clearance, and layered lighting round out the room. If a larger bathroom modification is in scope, specify it against the same drawing set rather than as a separate project.
The Kitchen
Vary counter heights rather than running one continuous line. A 30 inch zone with open knee clearance underneath gives you a seated work surface, and reads as a baking station or a desk rather than an accommodation. Specify drawer bases instead of door-and-shelf bases throughout, which is better storage for anyone and eliminates reaching into a dark cabinet.
Put the wall oven and microwave at counter height rather than overhead. Choose a side-opening oven door. Specify lever or touch faucet controls. Every one of these is a mainstream high-end kitchen choice that happens to also be the accessible one, which is exactly what universal design is supposed to look like.
Planning for Vertical Access
Vertical access is the decision homeowners defer most often and regret most expensively. You do not need to install anything now. You need to decide which of three paths you are preserving.
- Stack two closets. Identical footprints on both floors with a clear cavity between them. When you want a lift, the shaft already exists. Confirm with the architect that no mechanical runs are routed through that volume.
- Provide at a lift location. Reinforced landing, dedicated circuit, and confirmed ceiling height for a future home elevator or residential lift. A shaftless unit needs less than a traditional one, but it still needs clearances confirmed at the design stage.
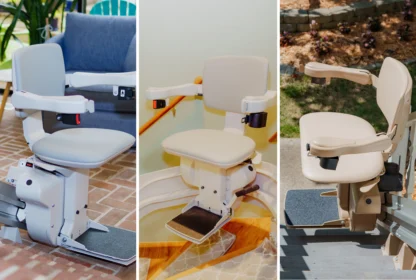
- Confirm the stair will take a rail. A stairlift rail mounts to the treads, not the wall, so the governing dimensions are tread depth, stair width, and the geometry at the top and bottom landings. Curved and winding stairs are entirely workable with a custom rail, but the stair width has to leave clear passage with the carriage parked.
| Questions worth raising at schematic design: Are any two closets or storage spaces vertically aligned, and can they stay that way? Where would a lift land on each floor, and what is routed through that cavity? What is the finished floor-to-floor height? Can the main stair carry a rail without dropping below clear passage width? Answers cost nothing at this stage and reopen nothing later. |
If the plan is a single level with a basement or a garage below, a vertical platform lift is often the cleaner provision: shorter rise, smaller footprint, lower cost, and it tolerates a garage environment that an interior elevator would not.
Sequencing and Who to Involve
The coordination failure to avoid is specifying equipment after framing closes. An accessibility assessment belongs between schematic design and construction documents, while the drawing set is still fluid and before anyone has ordered materials.
What an assessment contributes at that point is dimensional: confirmed clearances for the specific equipment you might want, the real electrical requirements, and the structural notes your architect can put on the drawings. It is a one-hour site visit that prevents the two most common outcomes, which are a rough-in sized for the wrong unit and a doorway that misses clear width by an inch.
Share the drawings with whoever does that assessment. A specialist reading a floor plan will flag things a general contractor will not, because they know which equipment the plan can and cannot accept. If you are still weighing which products belong in the plan at all, the guide to choosing the right mobility solution is a reasonable place to narrow the field before the meeting.
Frequently Asked Questions
What is the difference between universal design and ADA compliance?
ADA standards are a legal minimum written for public and commercial buildings, and they do not apply to a private residence. Universal design is a design philosophy with no enforcement behind it, which in practice means it often sets more generous targets than code. Use ADA dimensions as a floor to check your drawings against, then exceed them where the plan allows.
How much does it add to a renovation budget?
The provisions themselves are small, typically low single-digit percentages of a renovation when included from the start: blocking, wider framing, conduit, and a rough-in. The larger line items are the curbless shower, which carries real framing work, and any equipment you install now rather than provide for. The cost argument is the comparison, since the same work after completion routinely runs several times higher.
Does universal design hurt resale value?
The provisions that stay hidden, meaning blocking, conduit, and a closet rough-in, are invisible to a buyer and cost nothing in appeal. The visible choices tend to help: wider halls, better light, a curbless shower, and lever hardware all read as quality. Installed equipment is the only element where buyer reaction varies, which is another argument for provisioning now and installing when you need it.
Can an existing curbed shower be converted to curbless later?
Yes, but it means demolishing the pan and usually modifying the floor framing or the drain line to achieve the slope. On a slab, it can mean cutting concrete. This is precisely the kind of work that is routine during a renovation and disruptive afterward, which is why it belongs in the current scope if a bathroom is already being opened up.
When should an accessibility specialist look at the plans?
After schematic design and before construction documents are finalized. That window is late enough that the layout is real and early enough that clearances, circuits, and structural notes can still change on paper. Waiting until framing is up narrows the options to whatever the built dimensions happen to allow.
Getting It Into the Drawing Set
Everything above is a specification, not a product decision. You are not committing to equipment. You are keeping the house capable of accepting it, at a cost that only exists while the walls are open.
| 101 Mobility locations are independently owned and the technicians who assess your plans are the same team that would eventually install. Bringing them in during design means the rough-ins match real equipment dimensions rather than a generic allowance. Book a free consultation while the drawings are still open and get the clearances confirmed on paper. |